🦖 The “Totally Rawrsome” Pyjama Recipe by Sewing Direct🦖

Ever wondered what you need to make your own Totally Rawrsome pyjamas? If so, read on…

Flannel pyjamas by 3 wishes Totally Rawrsome collection and a Juki DX7 sewing machine

Ingredients for “Totally Rawrsome” pyjamas:

📐Prep:

Clear your sewing space. A clean sewing space is a happy sewing space… apparently!  Please note that I did not do this – I am a chaotic creator!

Take a deep breath and unfold your “Totally Rawrsome” fabric. Resist the urge to dive in without reading the pattern instructions – we’re in this for the long haul, not a quick cat nap.  It will actually save you some time, trust me I know.  This is absolutely a ‘do as I say, not as I do’ statement – I wasted endless hours of unpicking stitching because I did not follow this simple and obvious rule so take heed my fellow creatives.

Lay out your pattern pieces and pay attention to the grainline. No shortcuts here, or you might end up with pyjama bottoms that feel more like a twisted mess than a cosy cocoon – nobody needs to wake up with a wedgy.

🔍 Cutting with Precision:

Use your rotary cutter to carefully cut out each pattern piece. Think of yourself as a surgeon – precision is key. Don’t let the fabric “roar” louder than your determination!

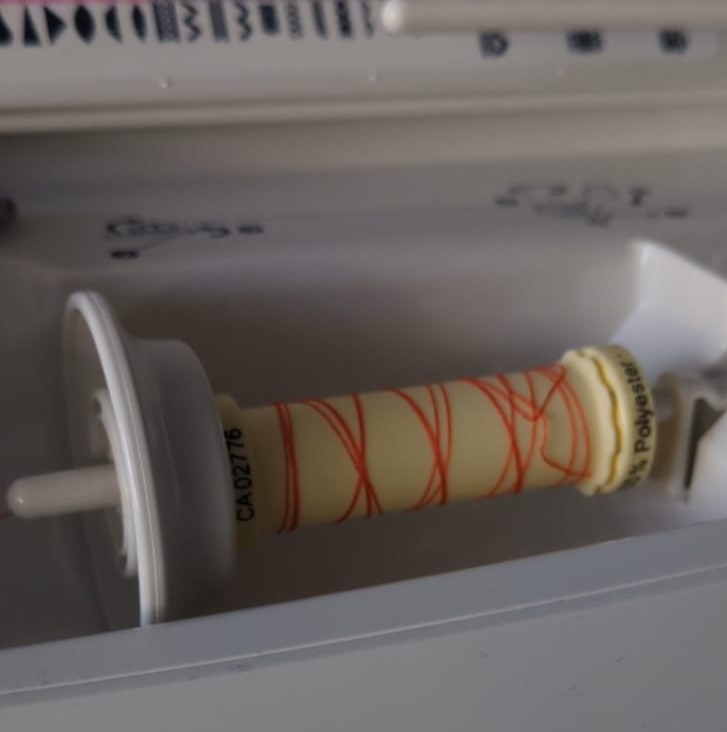
Fire up your Juki DX7 sewing machine and thread it with Gutermann thread. Choose a colour that complements or contrasts with your fabric – let your personality shine through!

Seam together your pyjama pieces, but beware of distractions. One moment you’re sewing straight, the next you’re zigzagging into a wild jungle of fabric. Fear not, the seam ripper is your trusty companion on this adventure.

Add a touch of flair to your pyjamas with a ribbon piping accent for an extra touch of whimsy – let your creativity roam free! Why not make things exciting and play a game of thread chicken at the same time?
✨Buttonhole magic:

It’s time to unleash the magic of your Juki DX7’s buttonhole foot! Measure and mark where you want your buttons to go, then let the machine work its spell to create perfect buttonholes. Just make sure you use the buttonhole foot correctly (unlike me) as one (or three!) wrong moves and you might end up with buttonholes that lead to a parallel universe of wonky stitches and several hours of unpicking.  The manual, YouTube and your trusty, knowledgeable in-store engineers were my heroes here.
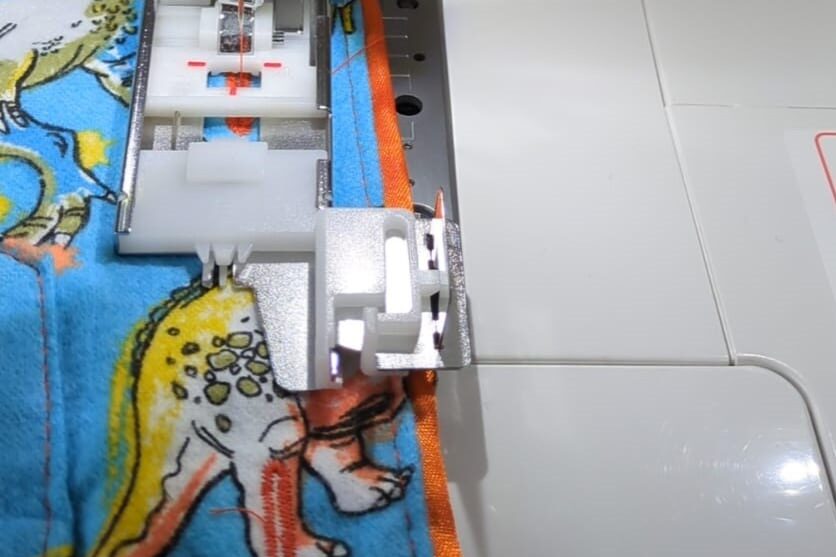
The magic buttonhole foot, sewing through multiple layers and interfacing effortlessly.

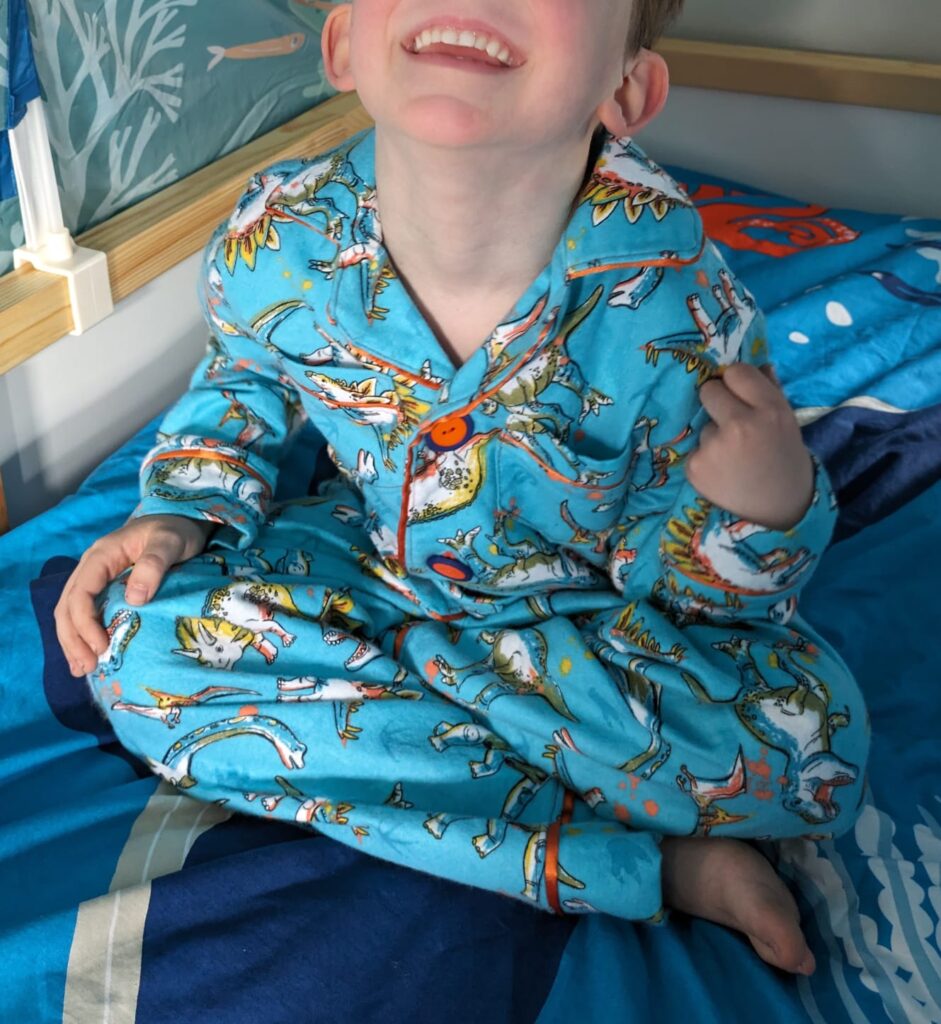
Trim any loose threads with your stork embroidery scissors, and stand back to admire your “Totally Rawrsome” creation. You’ve conquered the sewing jungle – one seam ripper battle at a time! Now we’re back to the bedtime battles, but at least they’re done with a smile!
📖 To sum it all up…

With your trusty sewing machine, a sprinkle of curse words and a dash of patience, you’ve turned fabric, ribbon and thread into a snuggly masterpiece fit for any bedtime adventure.

All items can be found in both shops today or online. For updates on fabulous new fabric arrivals, follow us on Facebook – Beeston shop / Mansfield shop

Enjoy your cosy nights ahead, and may your dreams be as “Totally Rawrsome!” as your pyjamas! 🦖💤
Bernina April Offers

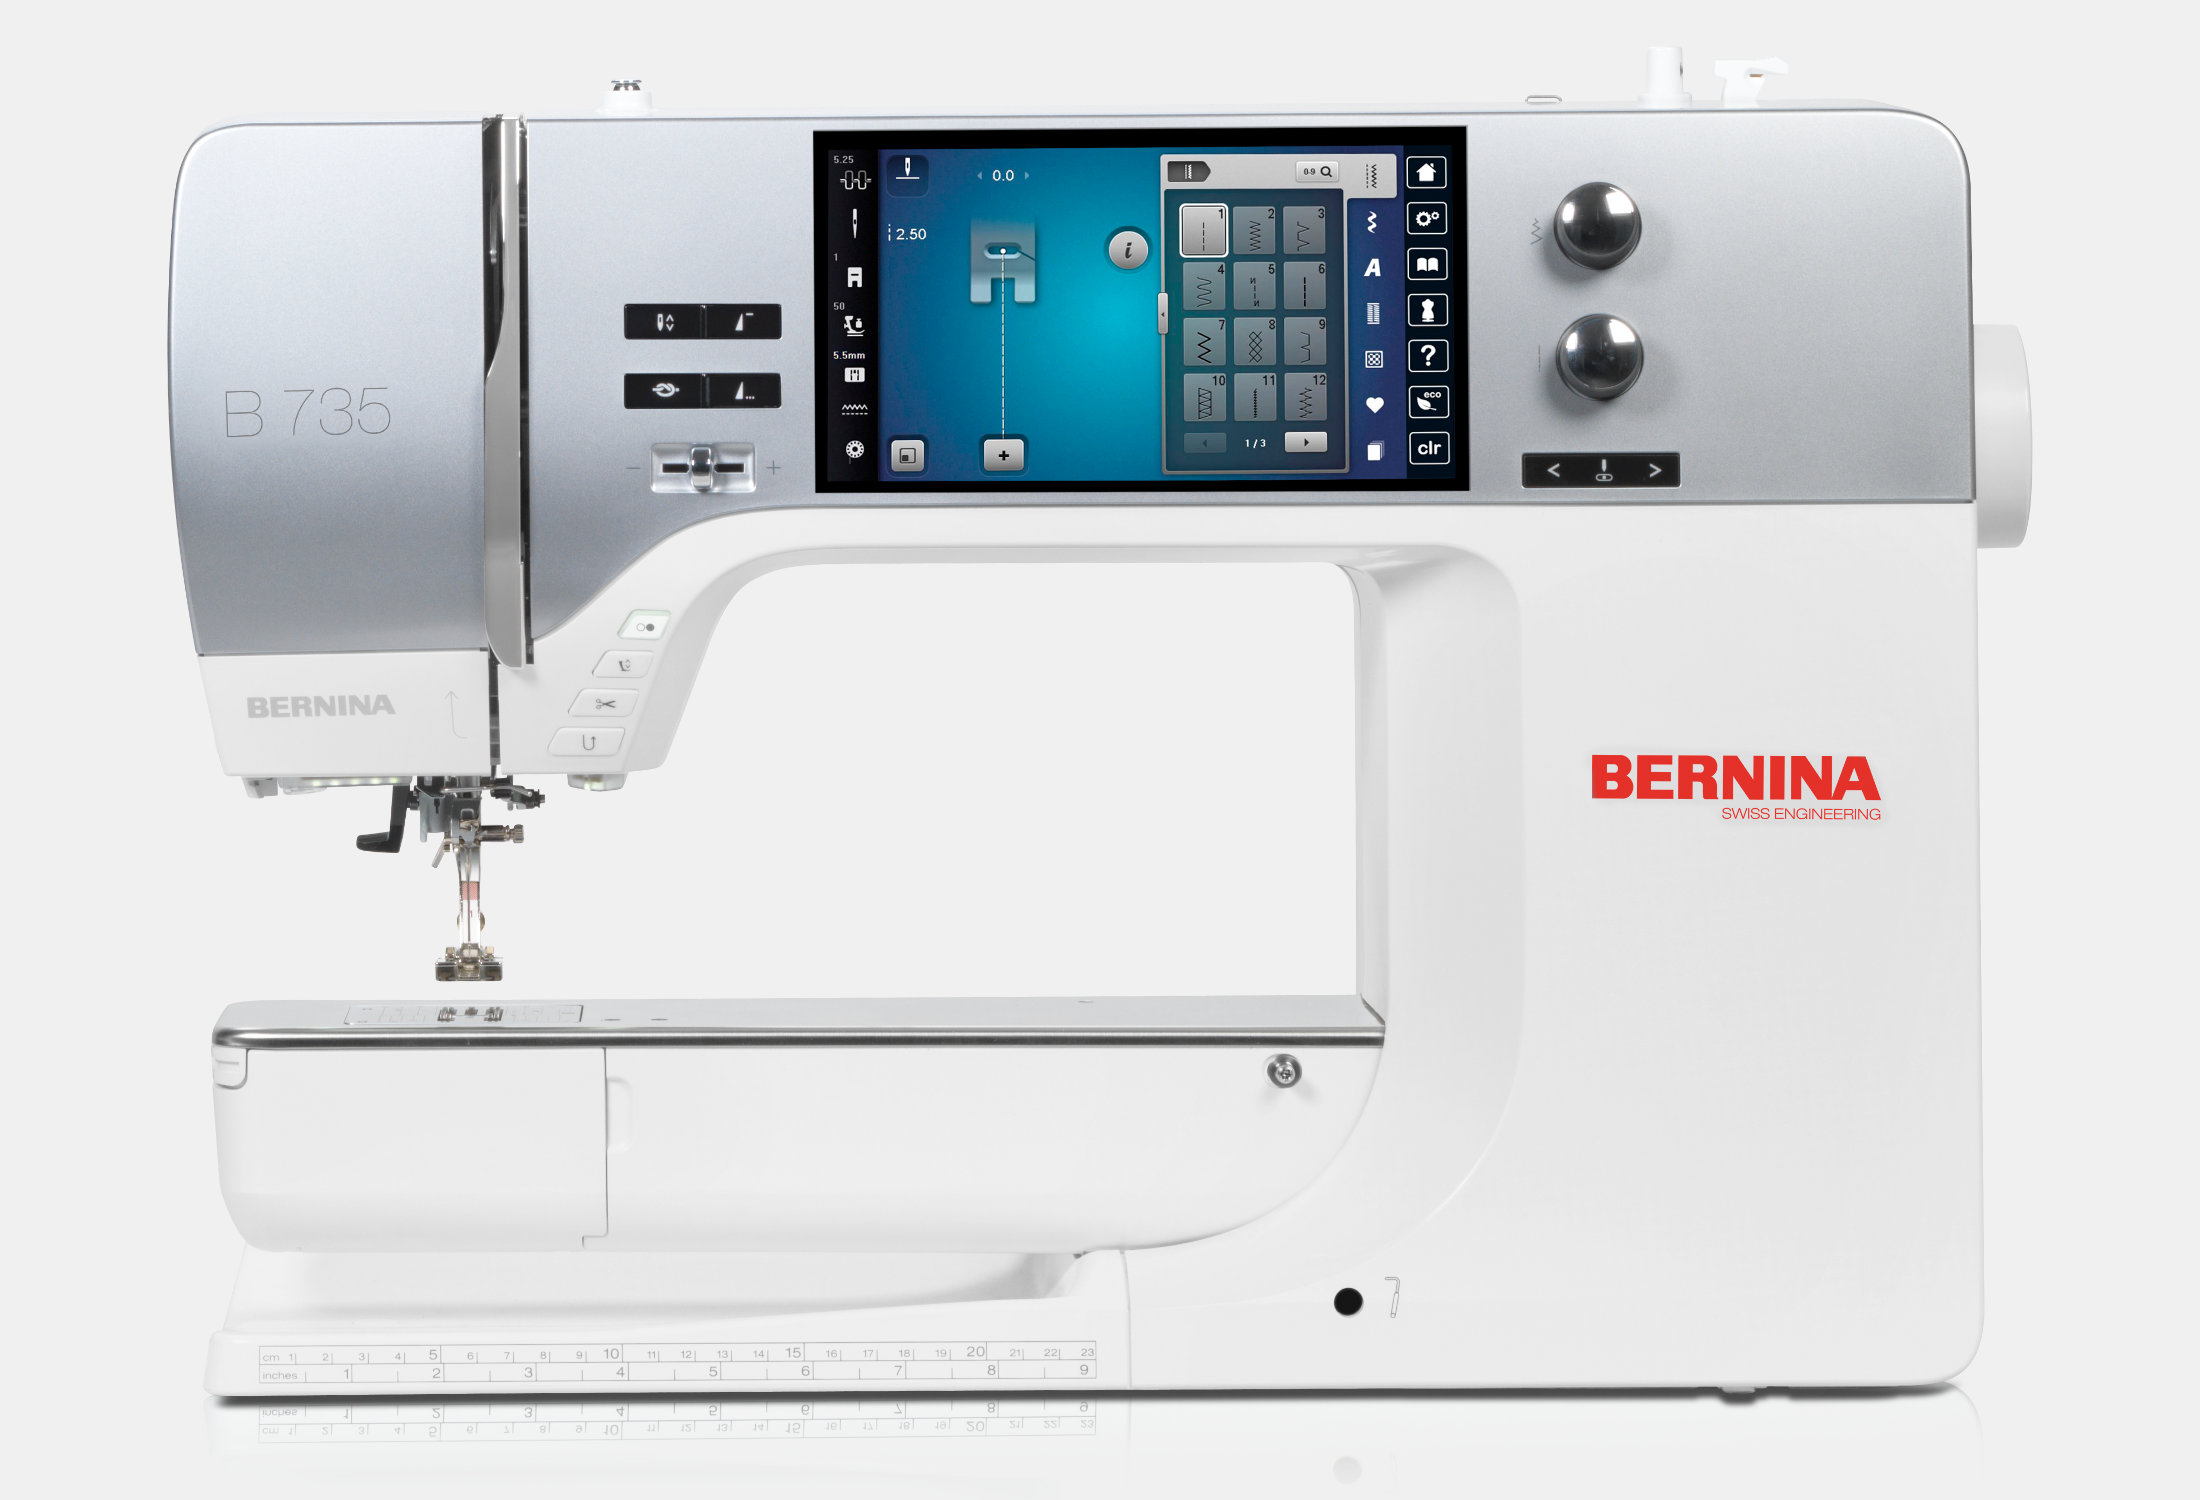
Discover an array of enticing offers from Bernina April Offers, conveniently curated on this page for easy access. Explore the exceptional deals awaiting you from Bernina this month. There is an excellent Bernina 735 offer, which has a saving of over £500.00 – there is also the offer for a ruffler foot, which for the dressmakers out there is a great foot and, at this price, a must. Then, as we move on to looking for a new Sewing and Embroidery machine, there is the YaYA Han B79 Edition, which is at a great discounted price; if you are looking for an Emboirdey only, then the b70 is a fantastic machine.


The first offer is the Bernina ruffler foot 86v

https://sewingdirect.co.uk/product/bernina-ruffler-foot-number-86/


Bernina 735 Sewing Machine – Free BSR and Free walking foot
https://sewingdirect.co.uk/product/bernina-735-sewing-machine/

Bernette b79 Sewing and Embroidery Yaya Han Edition
https://sewingdirect.co.uk/product/bernette-b79-sewing-and-embroidery-yaya-han-edition/

Bernette 70 DECO Embroidery Machine
https://sewingdirect.co.uk/product/bernette-70-deco-embroidery-only-machine/

This month, explore fantastic offers on the Bernette overlocker range, spanning the complete range of Overlockers and coverstitch models to the innovative Air-fed combi machines. Don’t miss out on these exceptional deals.

https://sewingdirect.co.uk/product-category/machines/sewing-machines/bernette/bernette-overlock-coverstitch-machines

Introducing Flexible Finance Options and Free Courses with Baby Lock Sewing Machines

Introducing Flexible Finance Options and Free Courses with Baby Lock Sewing Machines

Are you an avid sewing enthusiast looking to invest in top-quality equipment without breaking the bank? Or perhaps you’re a budding designer seeking to upgrade your sewing arsenal with cutting-edge machinery? Look no further! Baby Lock, the renowned brand synonymous with innovation and precision in the sewing world, is thrilled to announce exciting new finance options, making your dream sewing setup more accessible than ever before.

Spread the Cost of Your Order:

We understand that investing in premium sewing equipment can sometimes feel like a daunting financial commitment. That’s why we’re excited to introduce flexible finance options that allow you to spread the cost of your order over manageable monthly payments. Whether you’re eyeing that state-of-the-art serger or the latest embroidery machine, our finance options make it easier for you to bring your creative visions to life.

Representative Example:

Let’s break down how our finance options work with a representative example:

  • Cost of goods: £1,200.00
  • Deposit: £120.00
  • Loan Amount: £1,080.00
  • Term: 11 months
  • Monthly repayments: £98.18
  • APR (fixed): 0%
  • Total charge for credit: £0.00
  • Total repayable: £1,200.00

With our 0% APR (fixed) finance option, you can enjoy the convenience of spreading the cost of your purchase over an 11-month period, with no additional charges. This means you can acquire the sewing machine of your dreams without any added financial burden.

Free “Get to Know Your Baby Lock” Course:

But that’s not all! In addition to our flexible finance options, we’re delighted to offer a complimentary “Get to Know Your Baby Lock” course with every machine purchase. Led by our team of expert instructors, this course is designed to familiarize you with the ins and outs of your new Baby Lock machine, ensuring you get the most out of its advanced features and functionalities.

Join us at our Mansfield shop, Sewing Direct Mansfield, affectionately known as Sally Twinkle, located at 1 Handley Arcade, NG18 1NQ, for an immersive and informative session. Whether you’re a seasoned pro or a complete beginner, this course promises to enhance your sewing experience and unleash your creative potential.

Get in Touch for More Information:

Ready to embark on your sewing journey with Baby Lock? Don’t miss out on our fantastic finance options and complimentary course offer! For more information on our finance plans, or to reserve your spot in our upcoming course, please get in touch with us today. Our friendly team is standing by to assist you every step of the way.

At Baby Lock, we’re dedicated to empowering your creativity and making your sewing dreams a reality. Experience the difference with Baby Lock today!

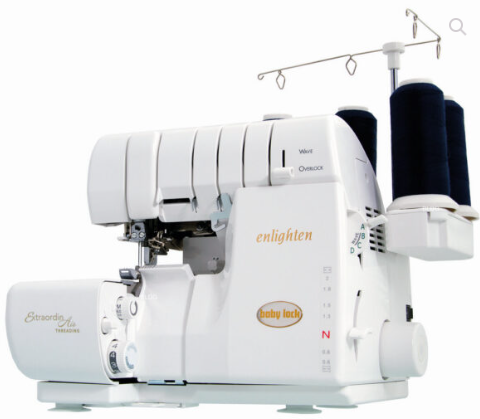
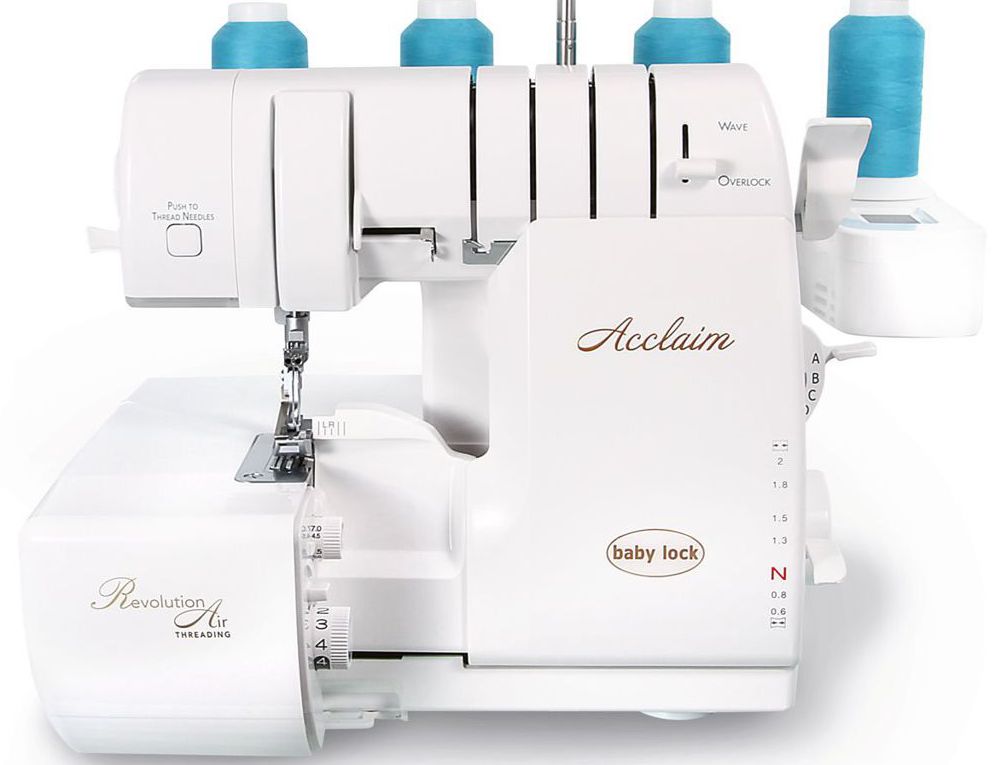
Unveiling the Magic of Precision Stitching with the Baby Lock Acclaim Overlocker

In the realm of sewing and crafting, the right tools can make all the difference. For enthusiasts and professionals alike, the Baby Lock Acclaim Overlocker stands out as a game-changer, combining precision, versatility, and ease of use in one compact package. In this blog, we’ll explore the features and benefits that make the Baby Lock Acclaim a must-have for anyone looking to elevate their sewing projects to new heights.

  1. Exceptional Stitch Quality: One of the standout features of the Baby Lock Acclaim is its ability to deliver impeccable stitch quality. With the Acclaim, you can achieve professional-looking seams and edges that add a polished finish to your creations. Whether you’re working with delicate fabrics or heavy-duty materials, this overlocker ensures that your stitches are even, secure, and visually pleasing.
  2. Revolutionary Jet-Air Threading: Say goodbye to the hassle of traditional threading! The Baby Lock Acclaim introduces the innovative Jet-Air Threading technology, making the setup process a breeze. This system allows you to thread your machine quickly and effortlessly, saving you valuable time and reducing frustration. It’s a feature that both beginners and seasoned sewists can appreciate.
  3. Advanced Differential Feed: Achieving the perfect fabric feed is crucial for preventing stretching or puckering. The Baby Lock Acclaim boasts an advanced differential feed system that ensures smooth and even stitching across various fabric types. Whether you’re working on knits, silks, or denim, this overlocker’s differential feed adjustment allows you to customize the settings for optimal results.
  4. Variety of Stitch Options: Versatility is a key aspect of the Baby Lock Acclaim. This overlocker offers a wide range of stitch options, allowing you to explore and experiment with different finishes. From basic overlocking and rolled hems to decorative stitches, the Acclaim empowers you to unleash your creativity and personalize your projects.
  5. User-Friendly Design: Navigating through the features of the Baby Lock Acclaim is a joy thanks to its user-friendly design. The clear and intuitive controls, coupled with the well-lit workspace, make it easy for users of all skill levels to operate this overlocker with confidence. The robust construction ensures stability during use, and the compact size makes it a practical choice for both home and professional studios.
  6. Quiet and Smooth Operation: Nobody wants a noisy sewing machine interrupting their creative flow. The Baby Lock Acclaim addresses this concern with its quiet and smooth operation. You can focus on your projects without the distraction of a loud machine, creating a more enjoyable and productive sewing experience.

Conclusion: The Baby Lock Acclaim Overlocker has earned its place as a top contender in the world of overlocking machines. With its unmatched stitch quality, innovative features like Jet-Air Threading, and user-friendly design, the Acclaim empowers sewists to take their projects to new heights. Whether you’re a seasoned professional or a hobbyist looking to enhance your skills, the Baby Lock Acclaim is a valuable companion that brings precision and versatility to every stitch.

Baby Lock Acclaim

Sew into 2024 with Confidence: Book Your Sewing Machine Service with Sewing Direct

Are you ready to embark on a year of creative sewing projects without a hitch? Look no further – Sewing Direct is here to ensure your sewing machine is in top-notch condition for a year filled with stitches and creativity! Start 2024 right by booking your sewing machine service with us this January.

Why Choose Sewing Direct?

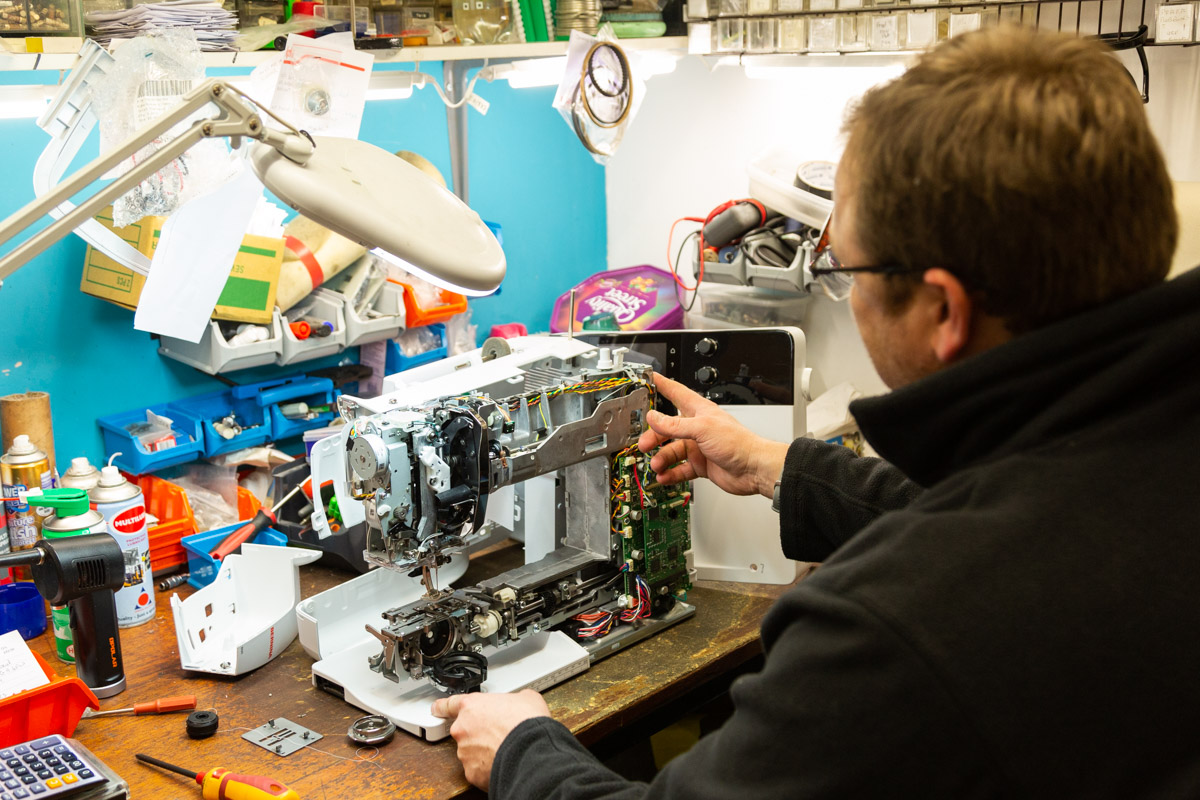
At Sewing Direct, we understand the importance of a well-maintained sewing machine. Our team of skilled technicians is dedicated to providing top-tier service that goes beyond just fixing issues. Here’s why you should choose us for your sewing machine service:

  1. Expertise: Our technicians are highly trained and experienced in servicing a wide range of sewing machine brands and models. From basic machines to advanced computerised units, we’ve got the expertise to handle it all.
  2. Comprehensive Service: We don’t just patch up problems – we provide a thorough service that includes cleaning, lubrication, tension adjustments, parts inspection, and rigorous testing to ensure your machine is in peak condition.
  3. Quick Turnaround: We understand the importance of your sewing machine in your creative process. That’s why we strive to provide a quick turnaround without compromising on the quality of service.

Benefits of Booking in January:

January is the optimal time to schedule your sewing machine service with Sewing Direct. Here’s why:

  1. Exclusive Discounts: Book your service in January and enjoy exclusive discounts as a token of our appreciation. Simply mention the code “SEW2024” when booking to unlock special savings on your service.
  2. Avoid the Rush: By booking early in the year, you avoid the peak season rush, ensuring that your sewing machine gets the attention it deserves without unnecessary delays.
  3. A Fresh Start: Give your machine a fresh start for the year ahead. Our January service includes a thorough cleaning to remove any residue and debris, setting the stage for smooth and precise stitches.

How to Book Your Service:

Booking your sewing machine service with Sewing Direct is easy and convenient:

  1. Visit our Website: Head over to [www.sewingdirect.com] to explore our services and pricing.
  2. Call Us: Reach out to our friendly customer service team at 01159223904 opt 1 to schedule your service over the phone.
  3. Mention the Code: Don’t forget to mention the code “SEW2024” when booking to secure your exclusive January discount. of 10%

Start 2024 with the confidence that your sewing machine is in the capable hands of Sewing Direct. Book your service this January, enjoy exclusive discounts, and sew into the new year with the assurance that your creative projects will be nothing short of amazing. Choose Sewing Direct – where your sewing machine gets the care it deserves.

that’s sew ready for success!

Unveiling the Magic of Baby Lock: A Recap of our Demonstration Day with Katy at Sewing Direct Beeston

Sewing enthusiasts, mark your calendars! On the 5th of January, something magical unfolded at Sewing Direct Beeston. Our store played host to a thrilling Baby Lock Demonstration Day, featuring the expertise of none other than Katy from Baby Lock. From 10 AM to 2 PM, the event promised an immersive experience into the world of Baby Lock, and it certainly delivered.

The Excitement Builds:

As the doors opened at Sewing Direct Beeston, anticipation filled the air. Sewing enthusiasts and curious crafters gathered to witness the wonders of Baby Lock machines firsthand. With Katy at the helm, the event promised to be an enlightening journey into the cutting-edge technology and innovative features that make Baby Lock a household name in the sewing community.

Katy’s Expertise:

Katy, a seasoned expert from Baby Lock, brought her wealth of knowledge and passion for sewing to the forefront. Attendees were treated to insightful demonstrations, where Katy showcased the full range of Baby Lock machines, highlighting their unique features and functionalities. From the user-friendly Symphony to the advanced technology of the Solaris, Katy guided attendees through the diverse lineup, offering tips, tricks, and personalized insights along the way.

Hands-On Experience:

The Baby Lock Demonstration Day was not just about watching—it was about doing. Attendees had the chance to roll up their sleeves and try out the machines for themselves. From the precision of the needle to the ease of the touchscreen interface, participants experienced firsthand why Baby Lock is synonymous with quality craftsmanship.

Exclusive Offers and Discounts:

To sweeten the deal, Sewing Direct Beeston offered exclusive deals and discounts on Baby Lock machines during the event. It was an opportunity for attendees to take home their dream machine at an irresistible price, ensuring that the magic of Baby Lock could continue in their own crafting spaces.

Community Building:

The event went beyond a mere product demonstration; it was a celebration of the vibrant sewing community that thrives at Sewing Direct Beeston. Attendees had the chance to connect with like-minded individuals, sharing stories, tips, and project ideas. Friendships were forged, and the sense of community that permeates the world of sewing was strengthened.

Conclusion:

The Baby Lock Demonstration Day at Sewing Direct Beeston on the 5th of January was more than just a showcase of machines; it was a celebration of creativity, innovation, and community. Katy’s expertise, combined with the hands-on experience and exclusive offers, made this event a memorable experience for all attendees. As the sewing community at Sewing Direct Beeston continues to flourish, the magic of Baby Lock will undoubtedly play a significant role in shaping the future of crafting for years to come. Stay tuned for more exciting events that bring the joy of sewing to the forefront of our creative endeavors.

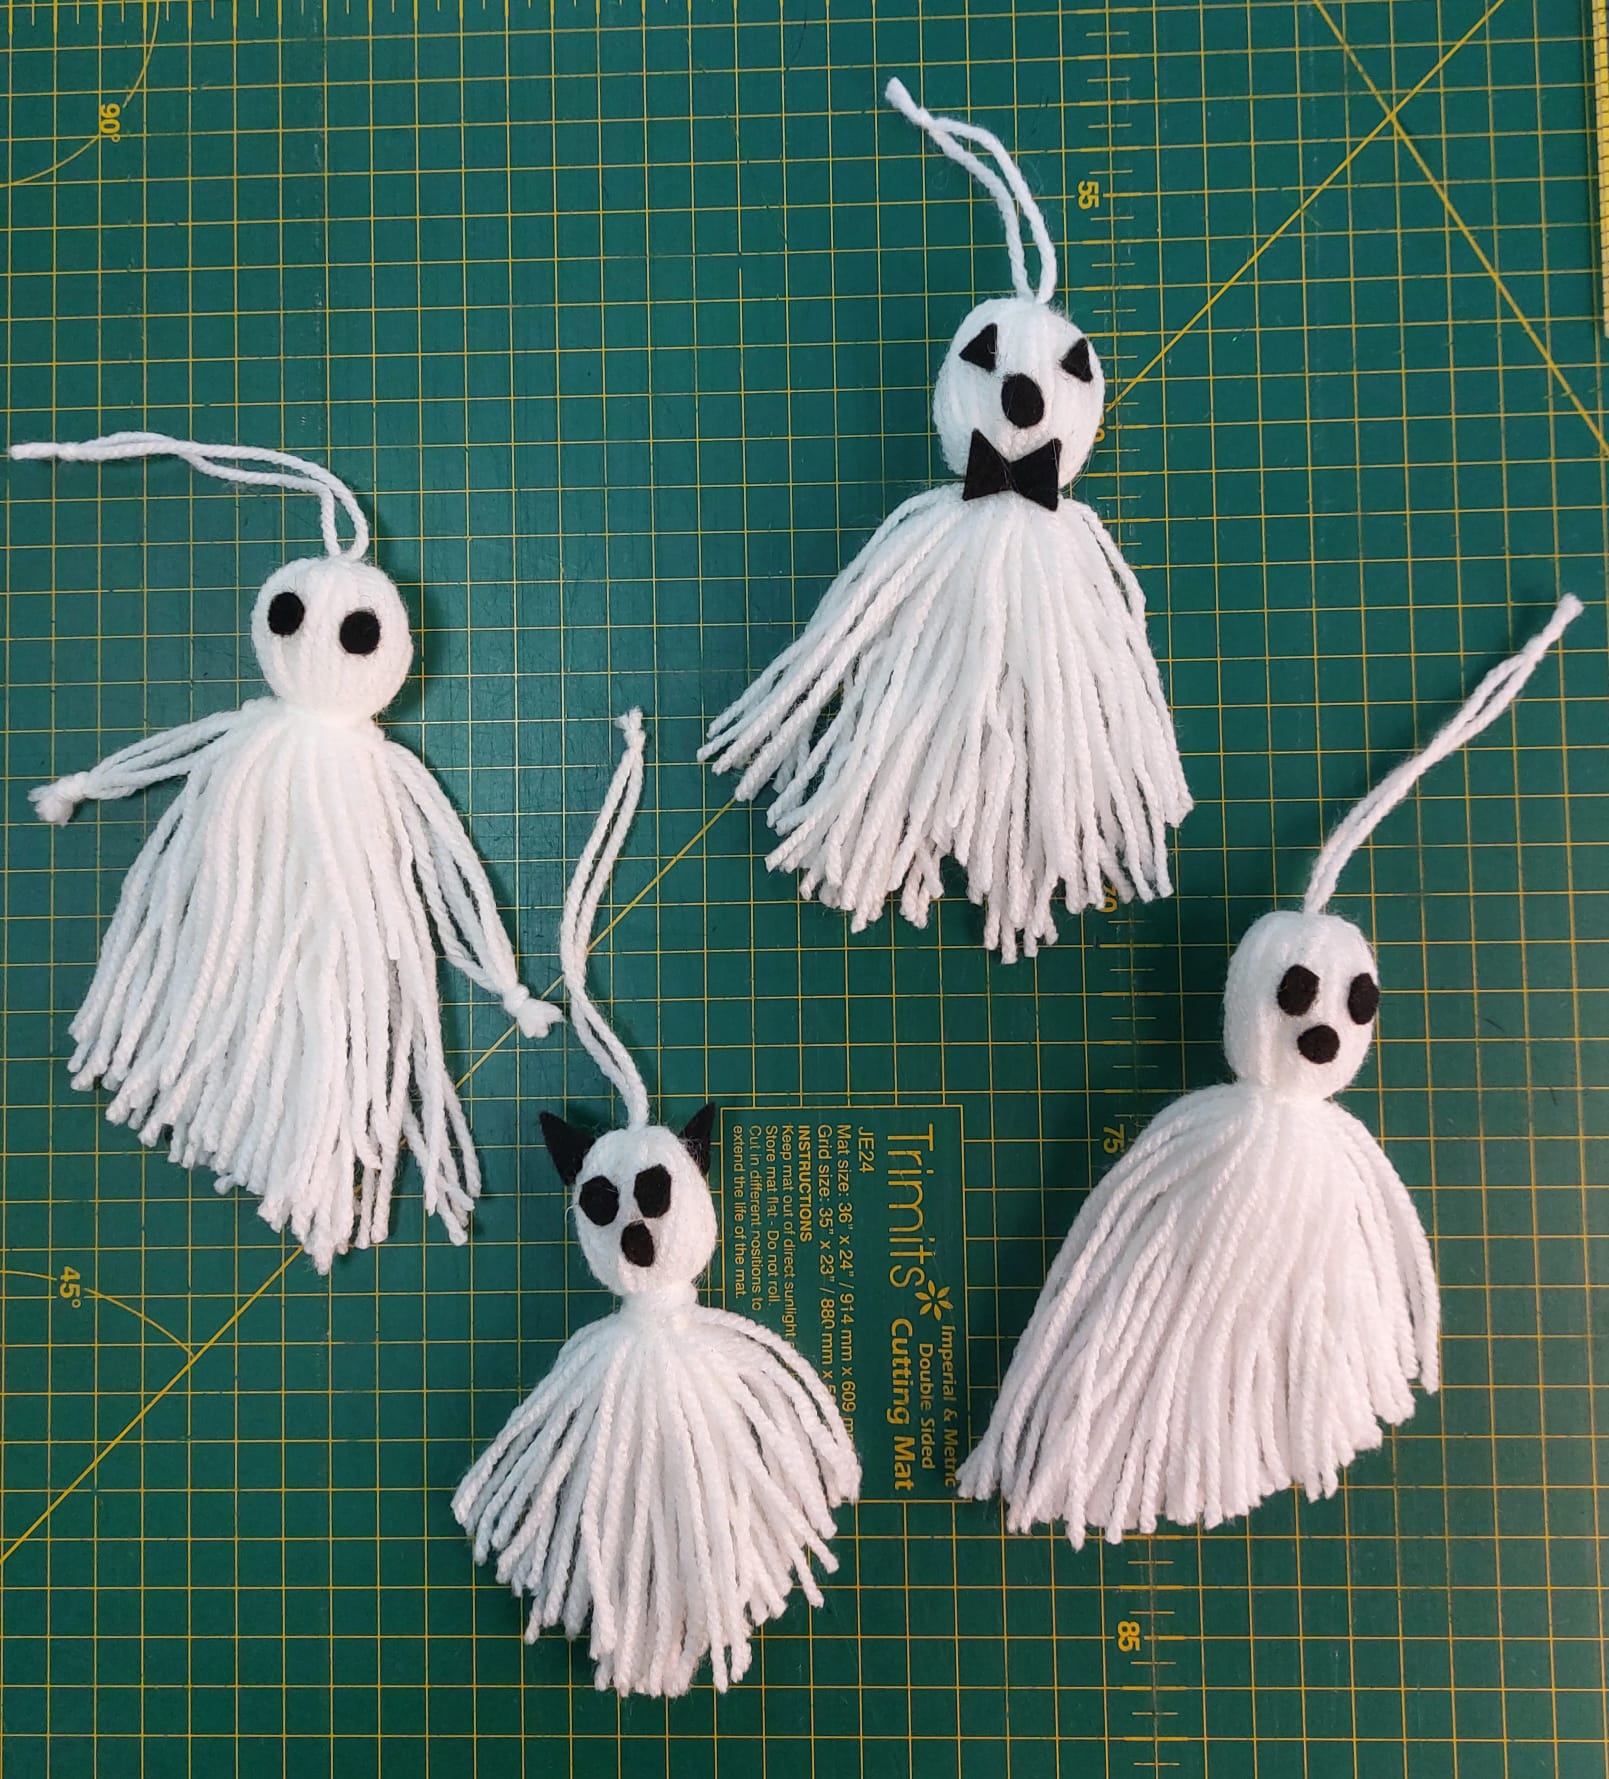
👻Easy Halloween craft project!!

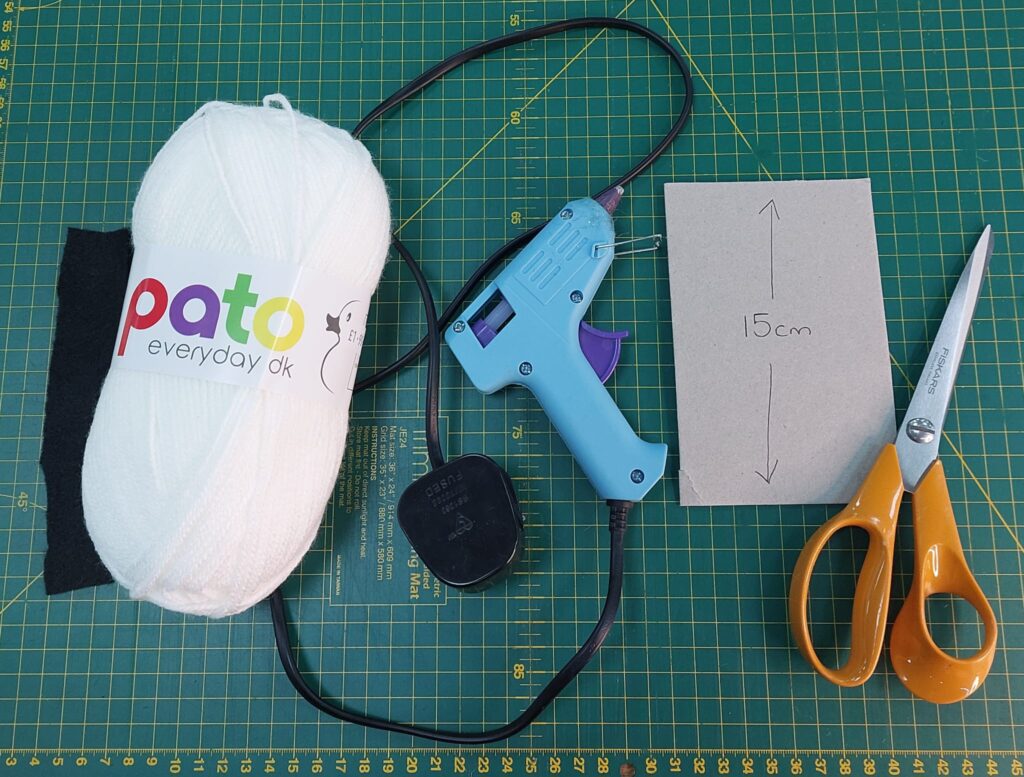
Tassel ghosts look great and are so easy to make! All you need is some white yarn, black felt, scissors, a small book or firm cardboard, glue, and away you go!!

I’ve used a glue gun for quickness, but any fabric glue will work.
TOP TIP: If using fabric glue, use a cocktail stick or cotton bud to apply the glue for a mess free experience!

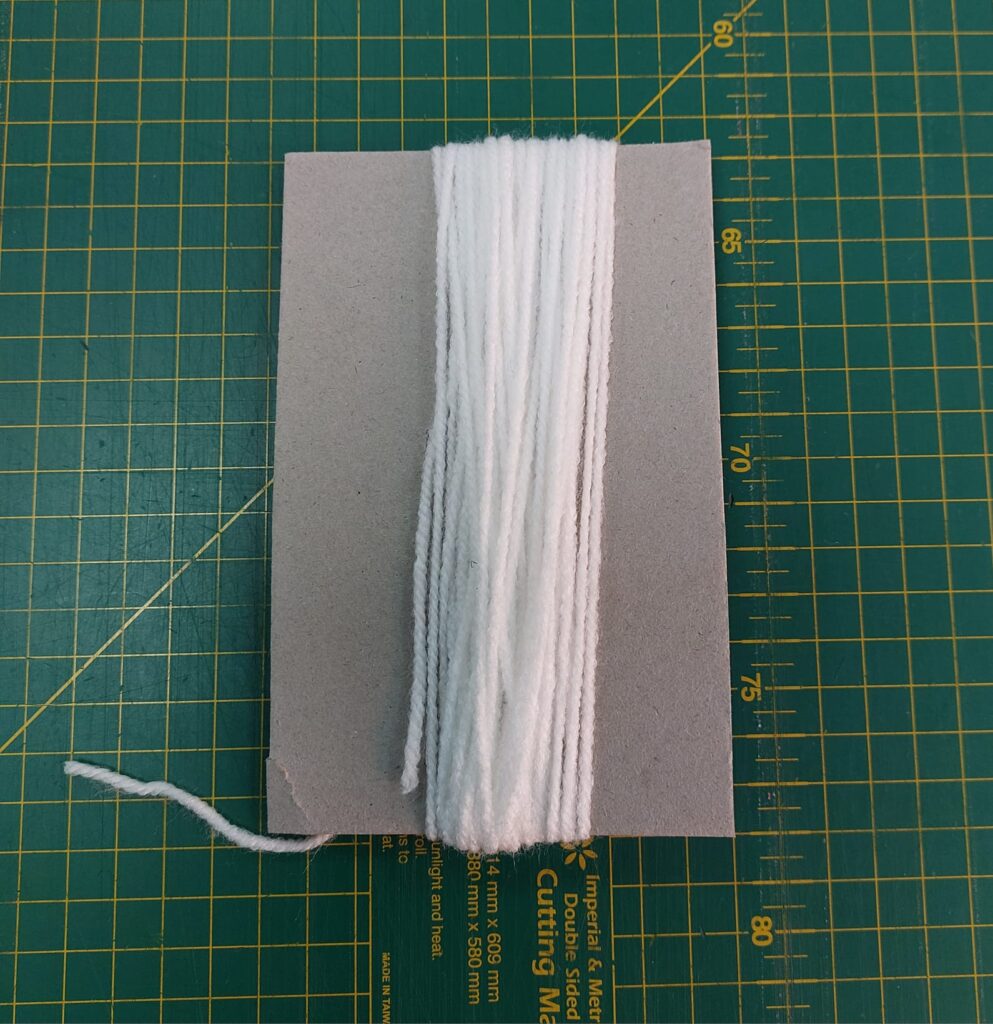
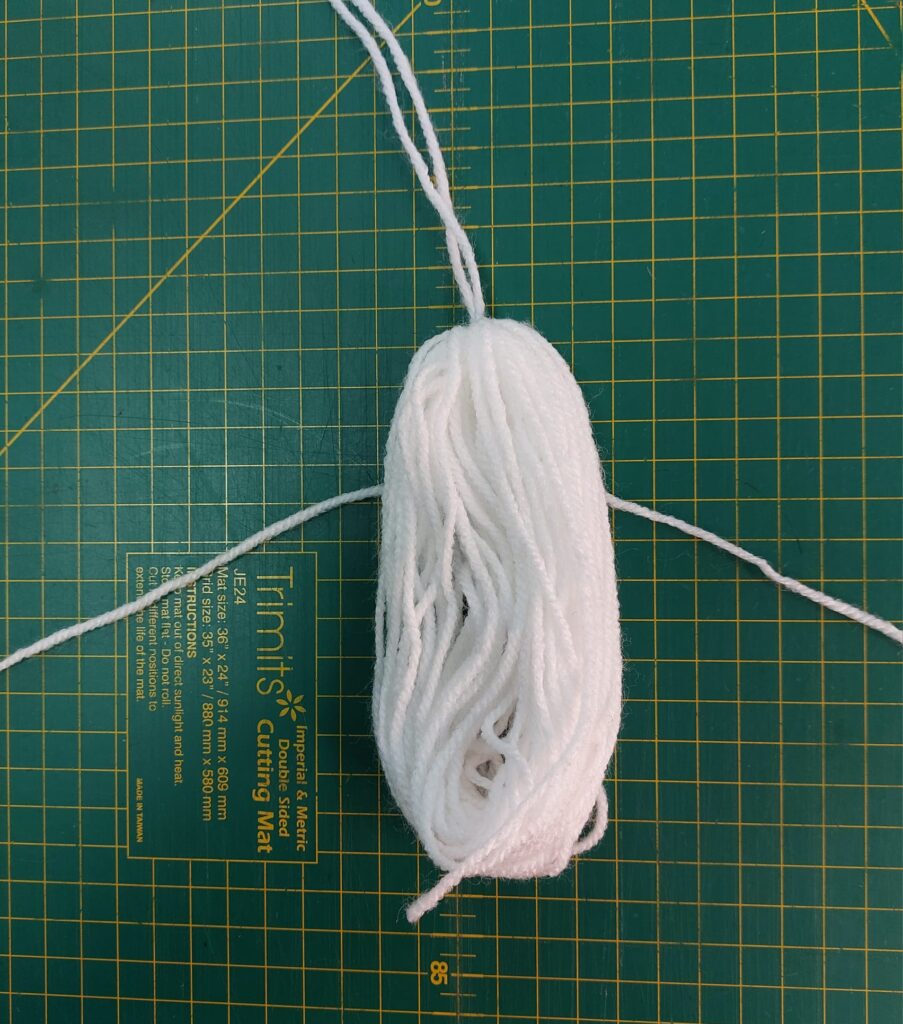
First of all, take your book/cardboard and wrap your wool around it about 30 times.

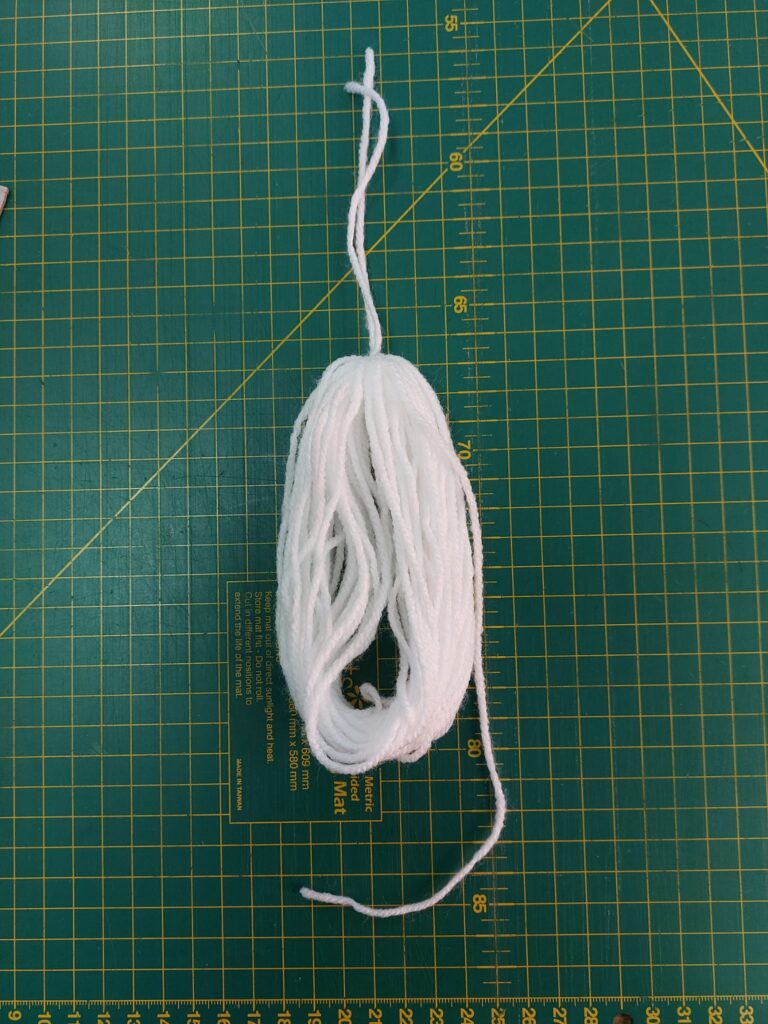
Carefully remove the yarn and tie a further piece of yarn approx 20cm long firmly at one end.

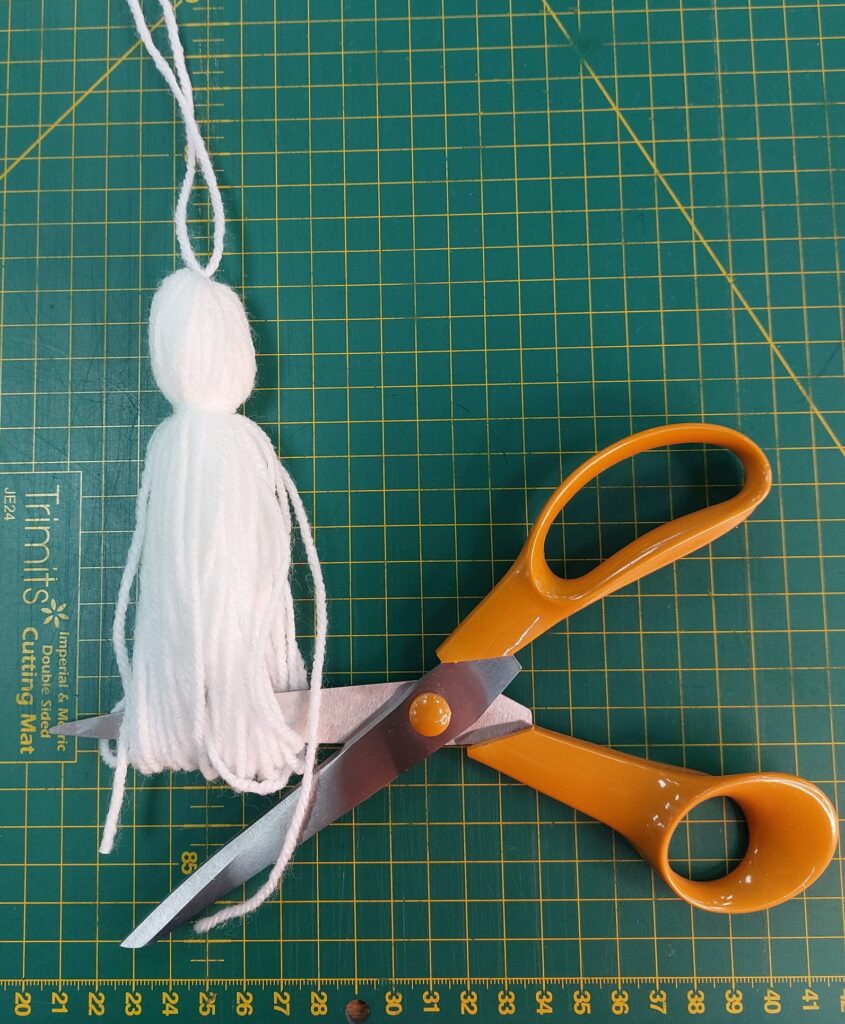
Cut the other end, take another piece of yarn, and tie around approx 3cm from the first tie. This forms the head!

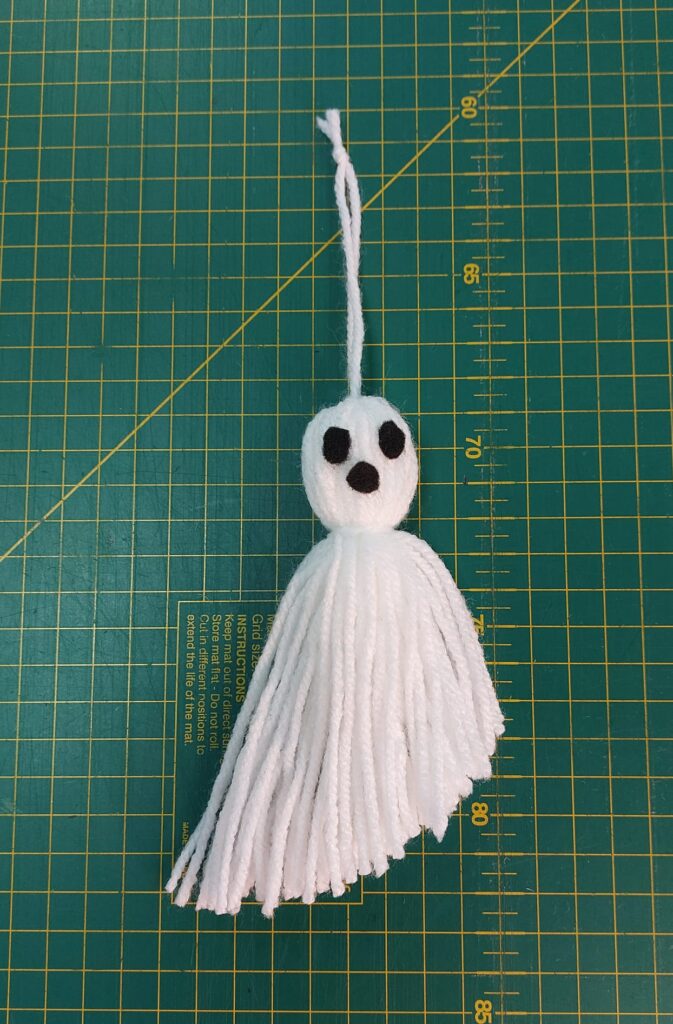
Carefully cut out eyes and a mouth from the black felt and glue them to the head. Alternatively, you could use small beads, pom poms, or buttons instead of the felt.
Finally, give your ghost a trim!

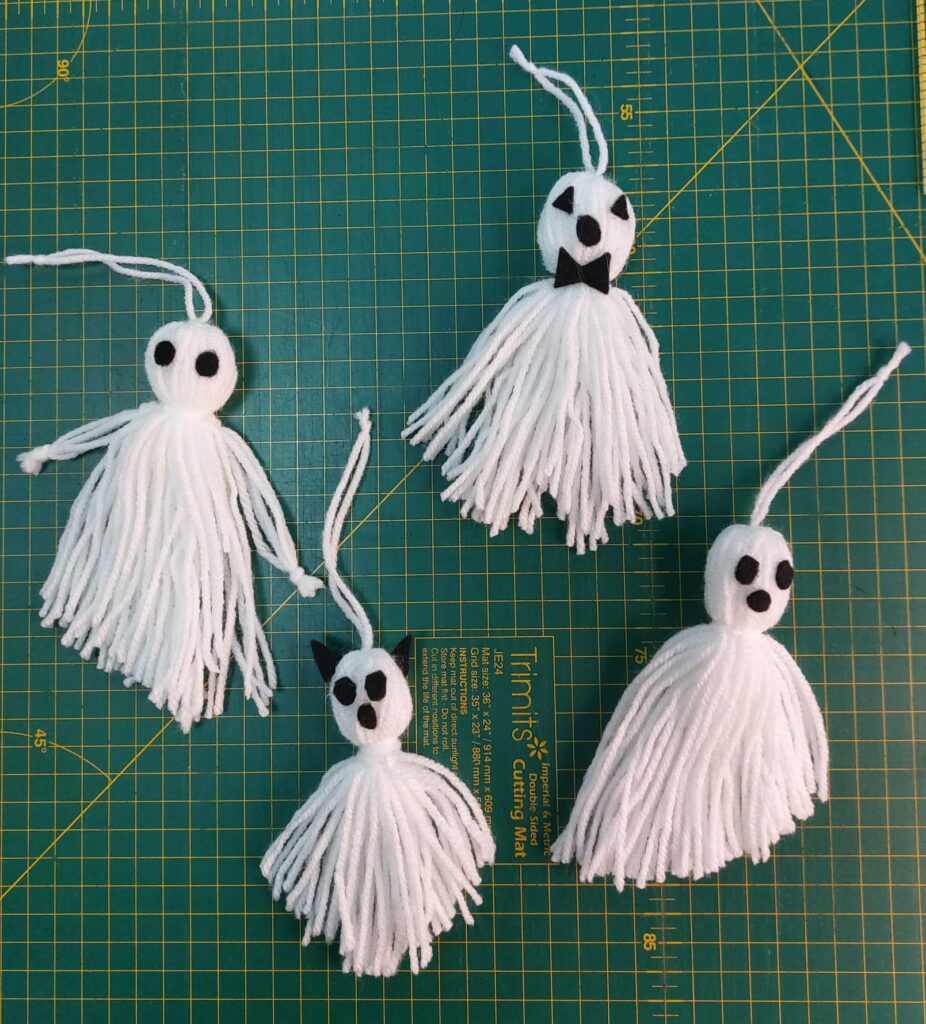
You could further decorate your ghost by adding a bow-tie, ribbon, ears – let your imagination run wild!
Make as many as you like, tie them to a length of yarn/ribbon/tape/cord for unique bunting to decorate your home this Halloween.👻👻👻👻👻👻👻👻👻👻👻

How to Make a Pumpkin

You will need scissors, a needle, fabric, stuffing, strong thread or twine, and cinnamon sticks.

Start off by cutting a circle out of your fabric – it doesn’t have to be perfect!

Sew a running stitch around the edge about 2.5cm in, leaving a good length of thread at the beginning and end.

Holding both ends tightly, pull to gather up your fabric to form a bowl shape.

Fill with your stuffing, and pull the threads tighter to close up your pumpkin, leaving a small hole to push in the fabric edges later on.

Tie your thread ends, ensuring they are nice and tight. Trim the threads to about 3cm.

Thread a needle with a good length of either your strong thread or twine and tie a knot in the end to prevent it from pulling through the fabric.

Thread from the top around the outside, dividing your pumpkin in half, and thread through the top to secure this long stitch. Pull a little taught, creating an indent on the outside of your pumpkin.

Continue doing this until you have divided your pumpkin up into 8 segments (4 times around the outside).

Tie your thread or twine tightly at the top and trim off to about 3cm.

Carefully tuck in the excess fabric and thread ends into the hole you left in the top of your pumpkin.

Take a cinnamon stick and push it firmly into the top.

Congratulations, you now have a beautiful pumpkin!!

The Ultimate Guide to Making Your Own Sewing Pattern

Have you ever looked at a garment and wished you could create your own unique version? Well, you’re in luck! In this comprehensive guide, we’ll walk you through the art of making your own sewing patterns. From draping and drafting to modifying and deconstructing, we’ll cover various methods to unleash your creativity. Whether you’re a seasoned seamstress or a beginner, this guide will equip you with the knowledge and skills to design and sew your dream projects. Let’s dive in!

Different Ways to Make Your Sewing Pattern

Draping: Draping involves manipulating fabric directly on a dress form to create a pattern. Pin and shape the fabric until you achieve the desired design, then trace the draped fabric to create your pattern.

Modifying: Take an existing sewing pattern and customize it to suit your vision. Adjust the length, neckline, or add embellishments to make it uniquely yours.

Deconstructing: If you have a favorite garment you’d like to replicate, deconstruct it carefully to create a pattern. This method requires precision to ensure you capture all the components accurately.

Drafting: Drafting a pattern from scratch involves using measurements and mathematical calculations to create a pattern on paper. It’s a versatile and rewarding way to design your sewing projects.

How to Make a Sewing Pattern: Materials and Equipment You’ll Need

Pattern Paper: Sturdy pattern paper is essential for drawing and preserving your sewing patterns. You can find specialized pattern paper rolls designed for this purpose.

Tracing Wheel and Tracing Paper: These tools help transfer the pattern from the muslin or fabric to the pattern paper without causing damage.

Ruler and French Curve: Precision is vital in pattern making. A transparent ruler and a French curve will help you create smooth and accurate lines.

Pencils and Marking Tools: Use good quality pencils or markers to trace and label your pattern pieces.

Measuring Tape: Accurate body measurements are crucial for drafting a pattern that fits perfectly.

Muslin Fabric: Use inexpensive muslin fabric to create a test version (toile) of your pattern before cutting into your final fabric.

How to Make a Sewing Pattern

Take Measurements: Start by taking your body measurements carefully. These include bust, waist, hips, and any other relevant measurements for the garment.

Draft or Modify the Pattern: Depending on your chosen method (drafting, modifying, draping, or deconstructing), begin creating your pattern on pattern paper. Remember to add seam allowances and markings.

Create a Toile: To ensure a perfect fit, create a toile using muslin fabric. Make any necessary adjustments to the pattern based on the fit of the toile.

Finalize the Pattern: Once you’re satisfied with the fit and design, finalize the pattern by transferring it onto a clean sheet of pattern paper, including all notches, grainlines, and labels.

How to Make a Sewing Pattern Fit You

Achieving a well-fitting garment is essential for a successful sewing project. Here are some tips to make your sewing pattern fit you perfectly:

Make sure to take precise measurements and compare them to the pattern’s size chart. Choose the pattern size that aligns best with your measurements.

Adjust Seam Allowances: Seam allowances can significantly impact fit. Check the pattern instructions to see if the seam allowance is included or if you need to add it.

Perform Fittings: During the sewing process, perform fittings at various stages to check the fit and make any last-minute adjustments.

The Best Stitch to Use When Making Clothes

For most clothing projects, the straight stitch and zigzag stitch are the two most commonly used stitches. The straight stitch provides a clean and sturdy finish for most seams and hems. On the other hand, the zigzag stitch is perfect for finishing raw edges, preventing fraying and adding flexibility to stretchy fabrics.

Best Sewing Machine for Pattern Making

When it comes to pattern making, a sewing machine with versatile features is ideal. Look for a model with adjustable stitch length, an automatic needle threader, and various stitch options, including straight stitch and zigzag stitch. A computerised sewing machine with digital controls can offer more precision and convenience.

Remember, practice and patience are key to mastering the art of pattern making. So, grab your materials, get creative, and let your imagination run wild as you design and sew beautiful garments that fit you perfectly. 

Drop by the Sewing Direct online shop to find everything you need for your next clothing project, including sewing machines, overlockers and sewing accessories. We also have a wide range of fabrics available so you’ll be sure to find one that works for you. Happy sewing!

Sewing Basics: How to Sew a Zip

The ability to be able to sew a zip into whatever creation you have in mind is a truly underrated skill. Of course, it can be quite an intimidating idea if you don’t know how to sew a zip. But not to worry, this is where we come in. With years of experience helping hobbyists all over the UK improve their sewing skills, we know what it takes to help every skill level.

How to Sew a Zip: Equipment You’ll Need

Before you jump straight into sewing in a zip into your fabric, it is a good idea to make sure you have everything you need before you get started. Here is a comprehensive list of items you need to successfully sew in your choice of zip.

If you’re short of a few of these items, check out our collection of sewing accessories.

How to Sew in a Zip: Method

Before you begin attempting to sew in your zipper, make sure your sewing machine is equipped with your zipper presser foot. What this presser foot allows you to do is to stitch right next to the zipper teeth creating a far neater stitch line. It also helpfully conceals the edges of the zipper tape, improving the overall finish. 

Finish Fabric Edges and Sew Together (Step 1)

The first step is to finish the edges of the fabric you intend on placing the zipper on. We would recommend finishing these with a zigzag stitch. Ensuring you’ve left enough space on each side of your fabric for your pattern’s recommended seam allowance, sew the two pieces together with a regular stitch. Only sew up to where the zipper will be installed.

Baste Zipper Opening and Press Seam Allowance (Step 2)

Using a long basting stitch, stitch the rest of the seam including over the section that will open for the zipper. As this stitch will be removed, there is no need to backstitch the endpoints. With the fabric’s wrong side facing up, if the seam allowance won’t sit flat when pressed open, use an iron to flatten it. 

Place Zipper (Step 3)

With the fabric the wrong side up, lay your choice of zipper along the basted section of the seam allowance. Start at the top, ensuring you align the top of the zipper with the top of the fabric. When you’ve settled on your preferred zipper placement, mark the stitch lines with your fabric marking pencil. 

Pin Zipper in Place (Step 4)

The penultimate step in learning how to sew a zip is pinning your zip in place. Make sure it is lined up from top stop to bottom stop. Pinning at the top and bottom alone is unlikely to give you as much control so we would recommend using multiple pins or sewing tape.

Stitch Zipper and Remove Basting Stitches (Step 5)

With the correct side facing up and starting at the top of the zipper, ensure your first stitch is just past the zipper pull. Be sure not to stitch too close to the zipper pull in order to maintain a straight stitch.

Once you have reached the bottom of the zipper, stop and turn the fabric 90 degrees to sew a few stitches along the bottom of the zipper. Rotate the fabric again to stitch the other side of the zipper. Ensure you backstitch in order to secure your stitch.

Now your zipper is attached, remove your basting stitches using your seam ripper. Remove any stray threads for a professional finish. This is the time to test your zipper.

Sew in Zips with Ease at Sewing Direct

If you’re looking for the best equipment to make sewing as easy and effortless as possible, look no further than our collection here at Sewing Direct. With a wide range of sewing machines and accessories, you’ll never be short of new ways to fall in love with sewing all over again. 
If you have any questions, please feel free to get in touch with us and a member of our team will be more than happy to help you with your sewing query.